Please see below a simple guide showing how to setup Microsoft authenticator app for MFA for a Work or School account.
1. Login to office.com on a web browser, and enter your email and password provided to you. You will come across this window below. Click on Next.
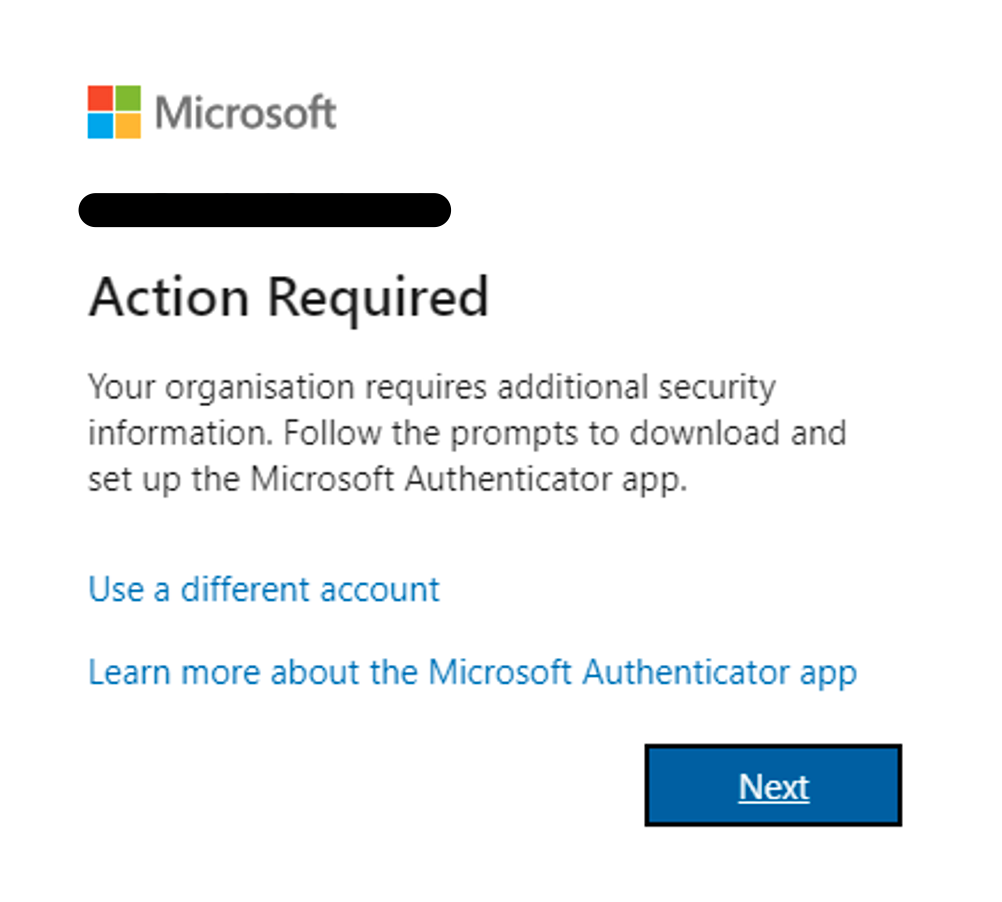
2. Follow the instructions on the next page. You will need to download Microsoft Authenticator app on your mobile Phone from App Store / Play Store. Please download the correct app with a blue padlock and a person symbol on it. Once downloaded, click on Next on your PC screen.
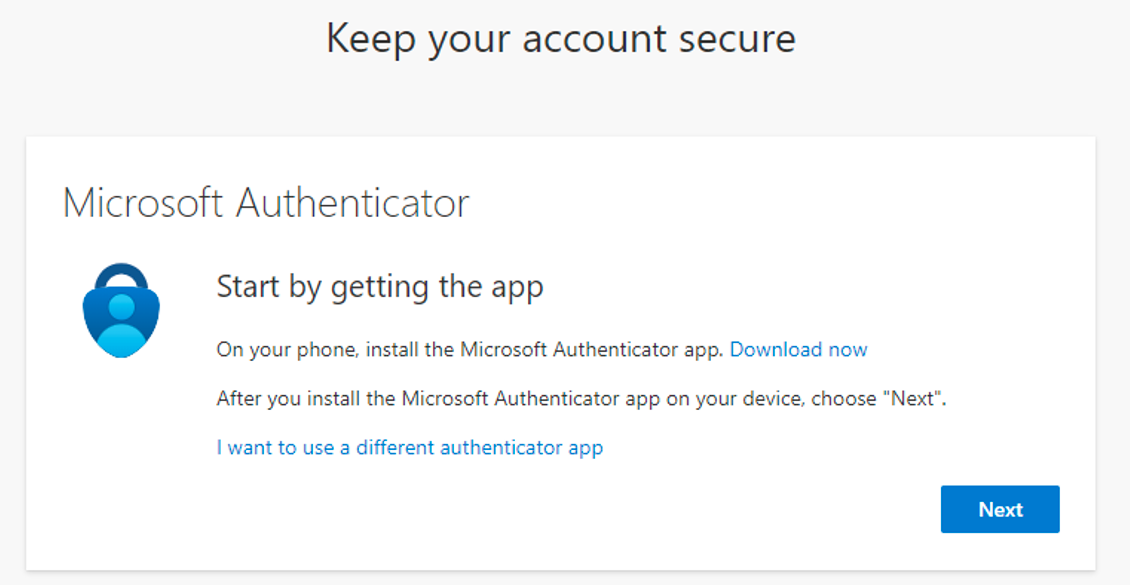
3. It will prompt on your Mobile app to allow notifications. Follow the steps shown in the image below.
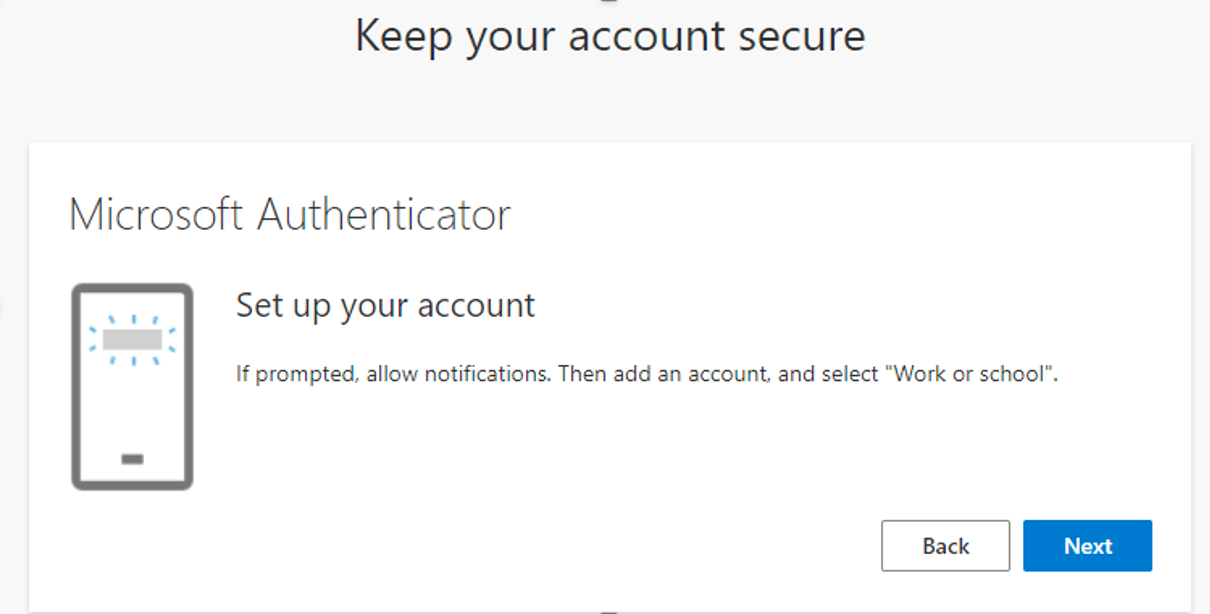
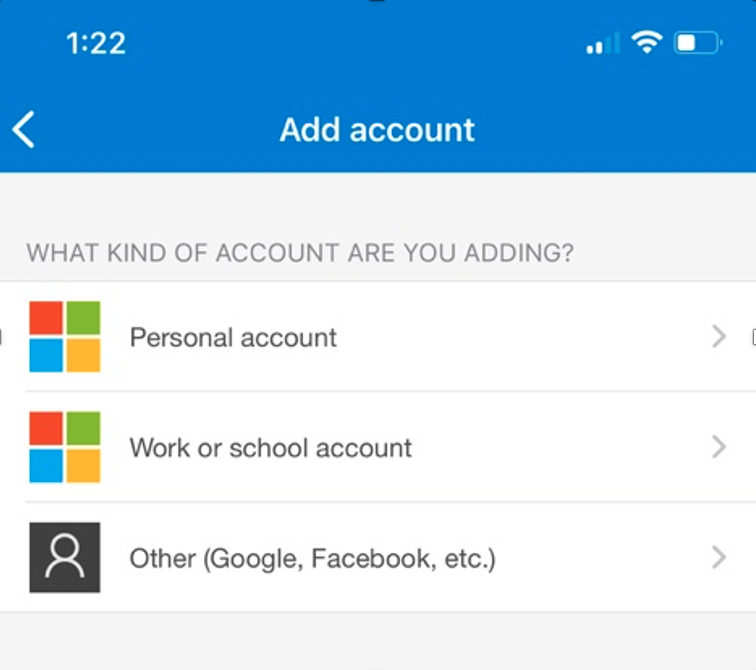
4. Once you have clicked on Add an account, select “Work or School” on the app and allow the permissions requested by the app (this is required), and click Next on PC screen.
5. It will then open the screen below on your PC, and on your mobile phone it will open to scan the QR code from your PC screen. Scan the code and click Next on PC screen.
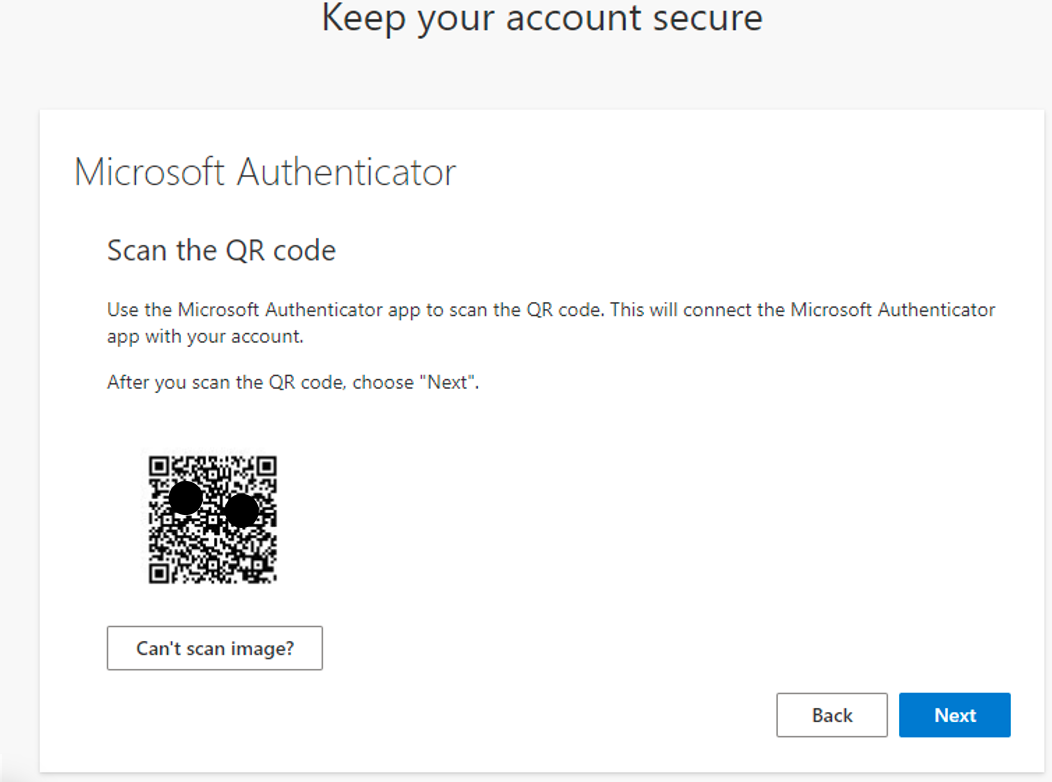
6. Enter the digits shown on the next PC screen, in your mobile app, when it pops.
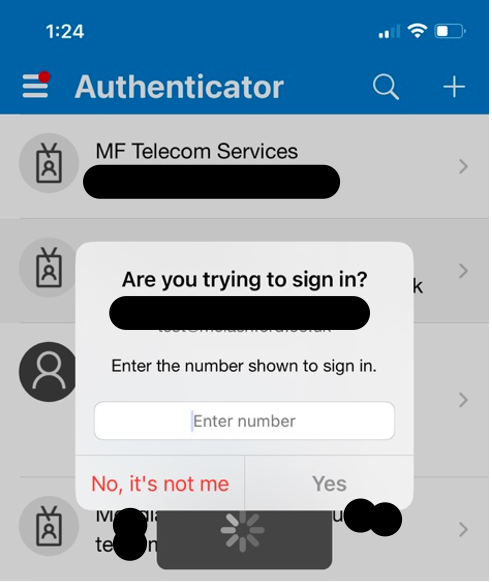
7. Once done, you will get the following confirmation on your PC screen.
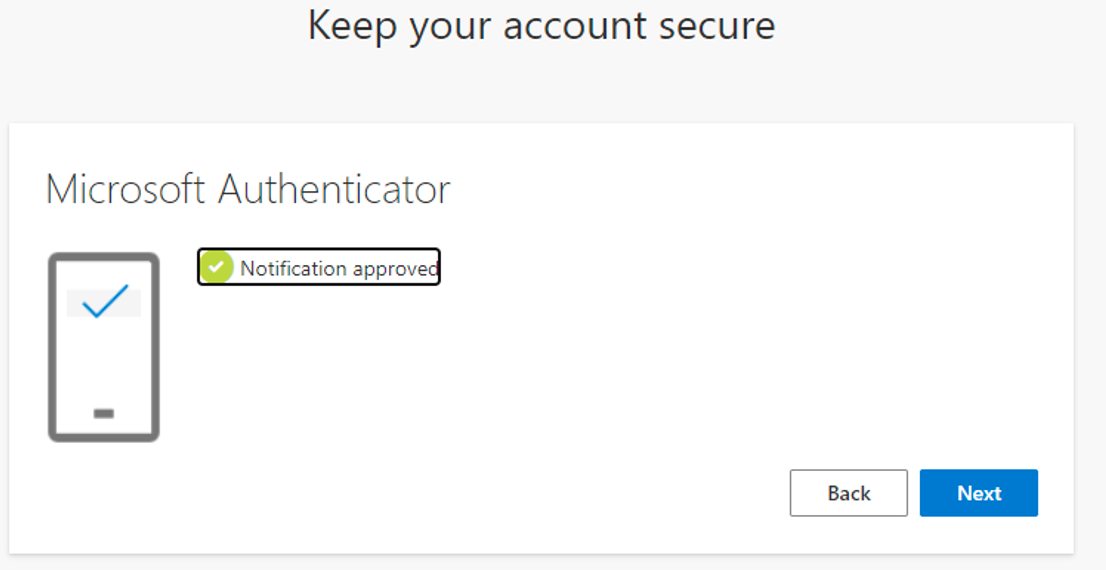
8. Click on Next and Done to finish the process.
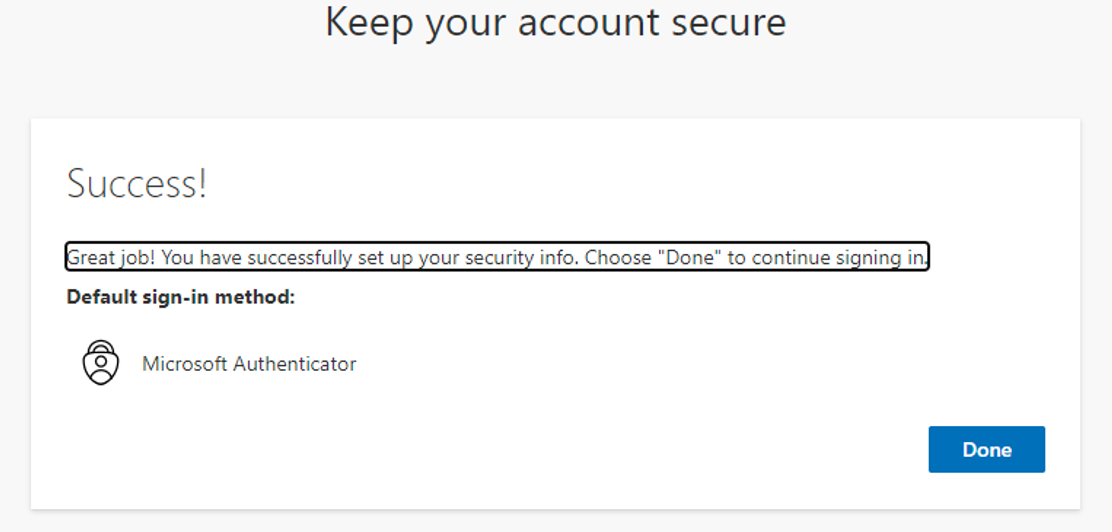
Please do not remove this app from your mobile phone as long as you are using this work or school account.
We hope this guide helps show you how to setup the Microsoft Authenticator app for MFA, but if you need further advice, please don’t hesitate to contact us.
You can view more free business IT support guides on our YouTube channel @mftelecomservices
Need Business IT Support? Get help here.

Book your free Cyber Security Health Check
Contact us if you need further assistance on How to Setup Microsoft Authenticator App for MFA
If you think your business could benefit from outsourcing its IT support, fill out the contact form above or contact us here
